General Instructions for VoIP Configuration
In our Help section, you'll find numerous guides for various VoIP hardware and software—from IP phones to VoIP apps for smartphones and computers, all the way to phone systems.
If you can’t find what you’re looking for for your VoIP solution, you can use this general guide as a reference:
1. Open the user interface
Depending on the device, you can configure your VoIP client in different ways:
- Via a web interface:
Most VoIP solutions have a web interface. You can usually access this by entering the device’s IP address in your browser. - Directly on the device:
Some devices—especially basic desk phones—are set up using a built-in menu. - In an application:
For softphones, you configure the settings directly within the respective app.
The exact procedure depends on the manufacturer and model of your device.
2. Enter your SIP credentials
Enter your personal SIP login credentials in your VoIP client.
SIP login credentials vary depending on the product. If you have trouble finding them, please read “Where can I find my SIP login credentials?”.
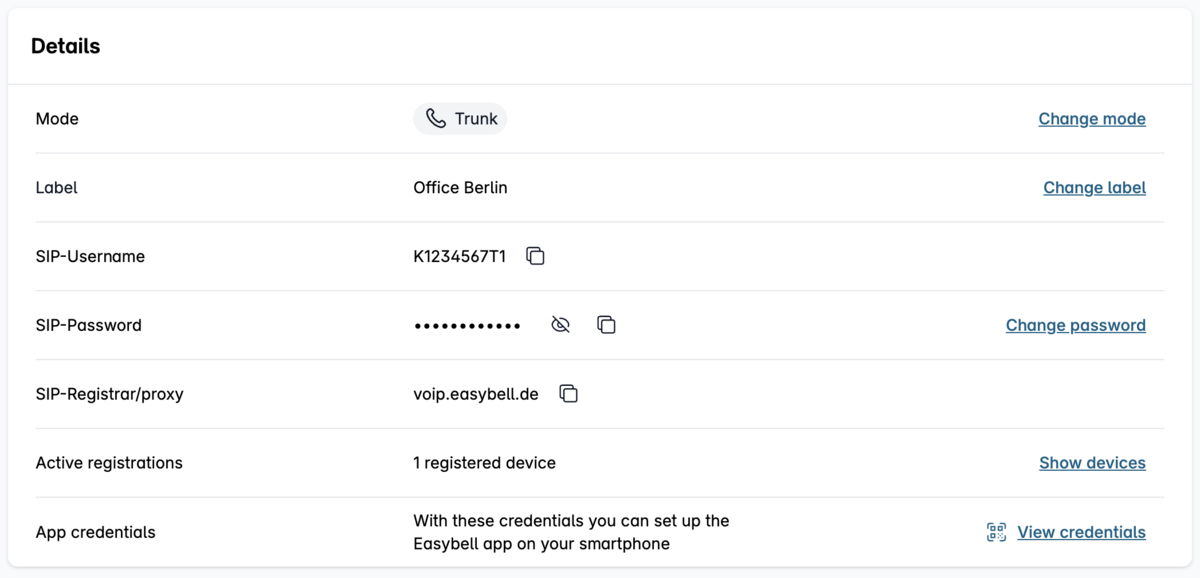
Phone numbers (or blocks)
SIP credentials: In my.easybell, under ″Phone Settings“ in the details view of the respective connection.
Registrar: sip.easybell.com
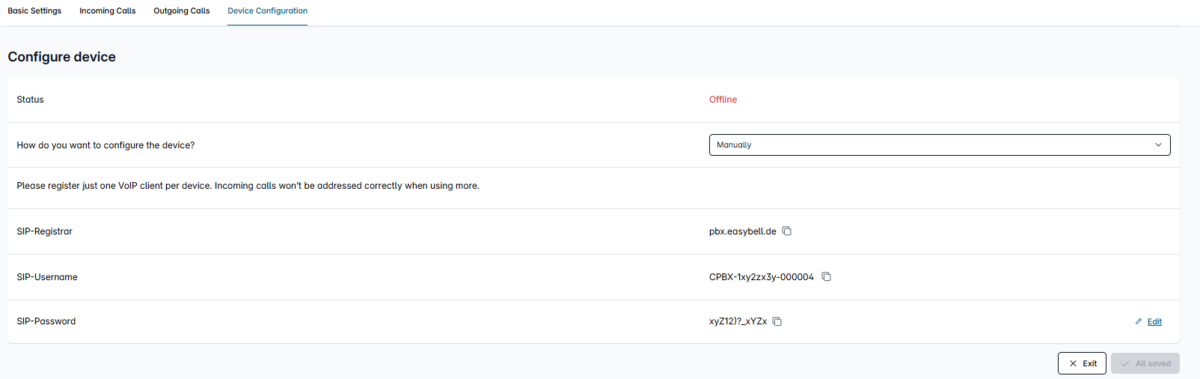
Cloud PBX
SIP credentials: In the Cloud PBX, go to the settings of the respective device and select ″Device Configuration“.
Registrar: pbx.easybell.de
3. Configure the registrar and connection
The registrar is the VoIP server to which your VoIP client logs in using your SIP credentials. You can often enter this in the same menu as your SIP credentials.
In most cases, you do not need to configure a STUN server or proxy server. If your device requires a proxy, please enter the same value here as you did for the registrar.
By default, your VoIP client should now be able to register, and calling should work.
4. Configure Codecs
To avoid audio problems and ensure that emergency calls go through, your VoIP client should use the following audio codecs in this order:
- G.722 (recommended for HD telephony)
- G.711A (PCMA)
- G.711U (PCMU)
The order of the codecs is important during codec negotiation. The highest-quality codec should therefore be listed first.
5. Complete the configuration
Save the settings and restart the device or application if necessary. After that, you should be able to make and receive calls.