We have completely redesigned our customer portal for you. If the steps described in the guide differ from what you see, you will find a PDF version of the old guide at the end of this article.
Set up a call queue in the Cloud PBX
1. Open the Cloud PBX
Open my.easybell and click on “Cloud PBX” in the menu bar.
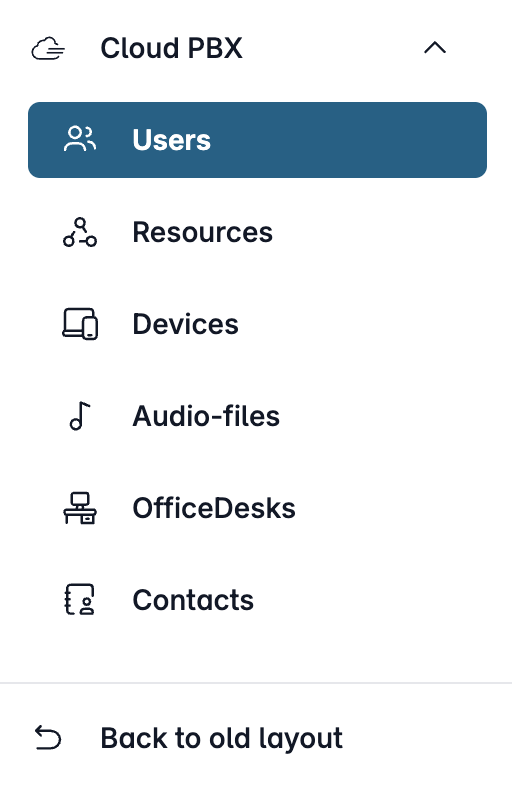
Depending on the function, the Cloud PBX uses two different types of extensions:
- User: person-specific extensions
- Resources: non-person-specific extensions
Please click on the relevant entry in the sidebar.
2. Create an extension
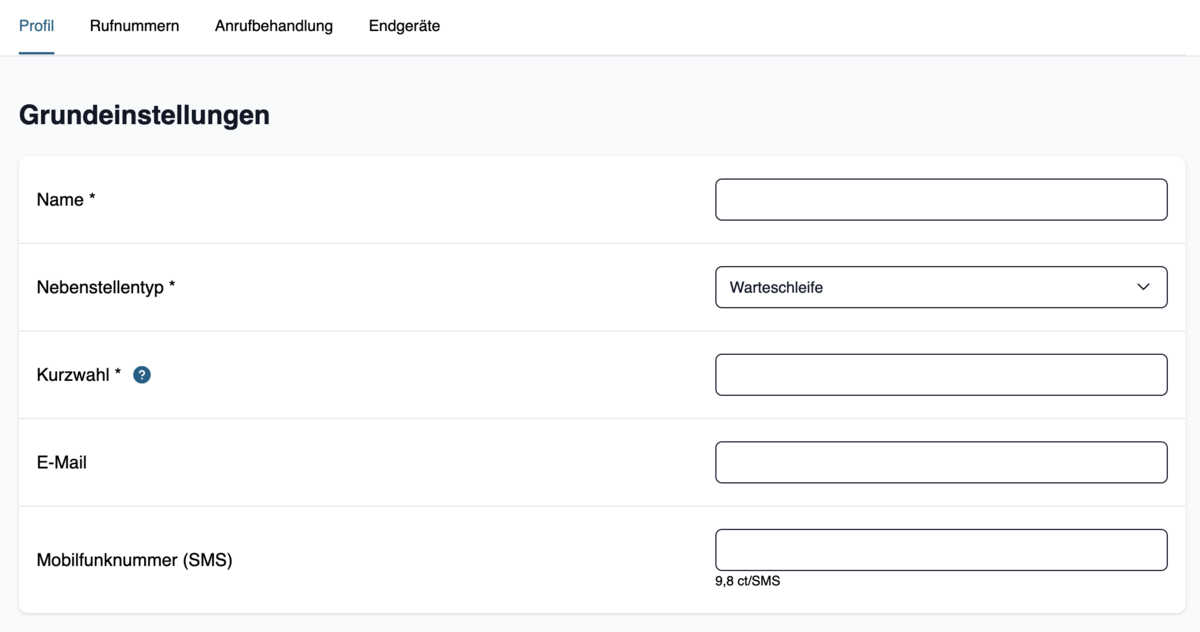
Go to the “Resources” section. First, create a new resource by clicking “AddResource.” Set the extension type to “Hold” and assign a speed dial number and a name to this extension. You can choose any name you like.
You can also enter contact information if you’d like to be notified of missed calls. You’ll find the notification settings in the “Call Handling” tab.

3. Configure the phone number
The phone number mode depends on whether you are using a single phone number or an extension from a block of numbers.
Go to the "Phone Numbers" tab and specify which phone number or extension the extension should respond to. For further assistance, see "Creating an Extension for the Cloud PBX."
4. Call Handling
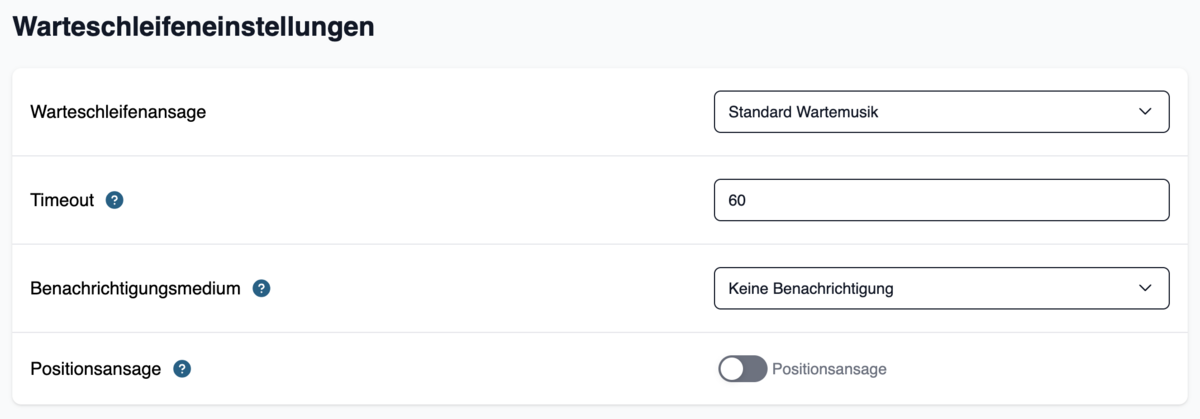
Now go to the “Call Handling” tab. In the “Queue Settings” section, you can select the music to be played while the caller is on hold and specify how long the call will remain on hold before being disconnected.
You can upload your own hold music or announcements in the Cloud PBX overview under “Audio Files.” Learn more about this topic in our article “Using Custom Hold Music in the Cloud PBX”.
If you wish, you can receive automatic notifications about missed calls. These are callers who either hung up while on hold or reached the end of the timeout. Select whether you would like to be notified via SMS, email, or both. Make sure you have entered your contact information in the “Profile” section.
Please note that SMS notifications incur connection fees!
5. Add devices

Finally, you need to add devices to the extension. To do this, click “Assign New Device” in the “Devices” section.
In the window that opens, you will see all the device accounts for your cloud phone system. Please check the box next to each device you want to assign to this extension. When you have finished making your selection, please click “Save” to return to the extension settings,
Here, too, please click “Save” to complete the setup.